Rapid Prototyping: Definition & Techniques To Develop Products

So you want to figure out how to validate your approach for a new feature or digital product?
In this day and age, searching for new methods and concepts for tackling rapid prototyping can bring back an incredible amount of information, and honestly, it can be pretty hard to parse through all of that information to find something that makes sense for your specific need.
Well my friends, you’ve come to the right place. As a Digital Product Manager with 6 years of experience managing the lifecycle of building, testing, and iterating on technology, I’ve had my fair share of testing different rapid prototyping techniques across products.
During my time at Crema, I’ve learned how to hone-in on the best type of rapid prototyping techniques for a specific application, as well as when and where they apply best, and how to utilize them most effectively to find answers to the questions that are needed to build the best possible version of a product.
In this article, I’ll be sharing my 6 go-to rapid prototyping methods, and discussing how you can find the perfect technique that provides the fidelity you need.
Rapid Prototyping Recap: What Is Rapid Prototyping?
Studies have shown that “prototyping helps ensure that the nucleus of a system is right, before the expenditure of resources for the development of the entire system.”
This of course, sounds like music to our product manager ears, particularly when there’s a focus on understanding if a new approach/tool is going to be worth the squeeze of building it.
So, what exactly is the rapid prototyping approach?
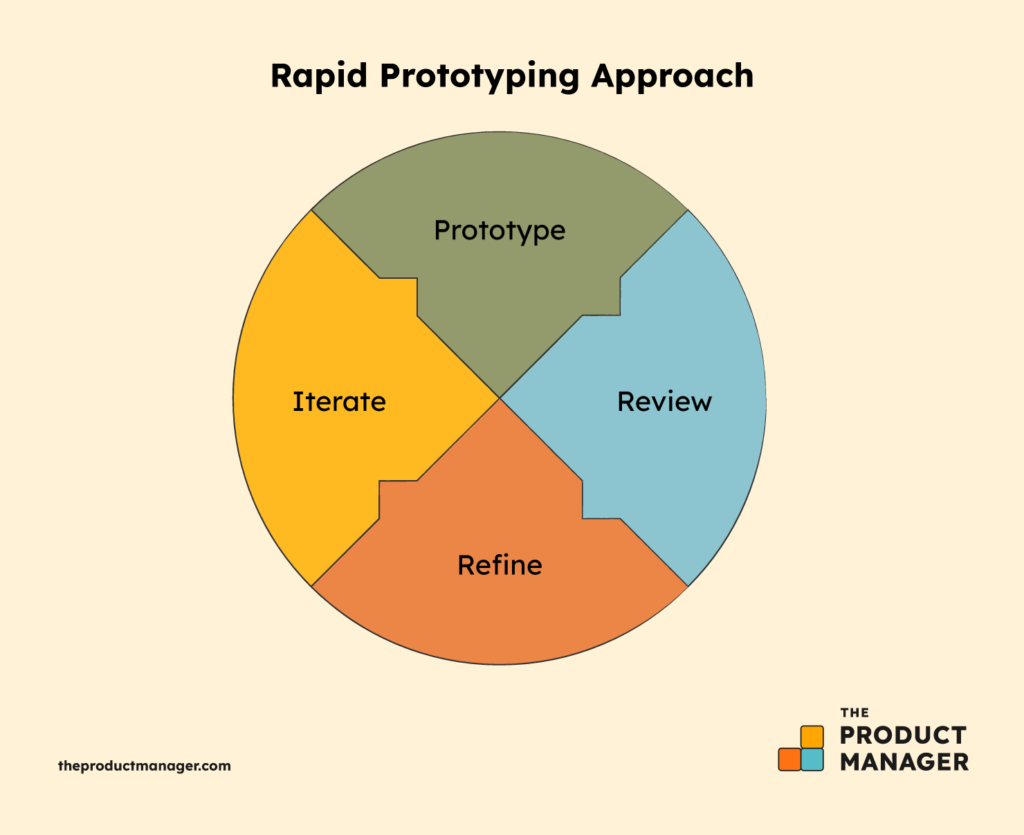
Rapid prototyping is all about getting an idea in front of users, collecting feedback, and quickly refining and iterating your idea based on that feedback. It’s an indefinite loop, which should be utilized over and over until the team is satisfied with their validated approach.
The Fidelity Decision: High Fidelity vs Low Fidelity
High Fidelity? Low Fidelity?…What does it all mean?
The first thing we need to fully understand in order to determine which types of rapid prototyping will work best for your prototype is the level of fidelity.
Both high and low fidelity prototyping approaches are incredibly beneficial, but their individual impact will greatly depend on whether they’re implemented at the right time.
InVision, an industry leader in high fidelity prototyping software and iterative design process thinking, also recognizes and encourages people to understand the differences between the approaches:
“Prototyping at the wrong fidelity is one of the top prototyping mistakes. Unfortunately, there isn’t a one-size-fits-all solution. Instead, you should evaluate it based on each individual scenario.”
Low Fidelity Prototypes
These are low-cost, easily attainable, and great for new projects or ideas that need to be validated or invalidated by multiple stakeholders. This type of approach is useful for those who may not have immediate access to resources for design and/or development.
High Fidelity Prototypes
These are higher in cost since they can utilize development/design resources, but high fidelity prototypes allow for a more real-life experience for users to provide feedback on. This type of approach is great for projects that want to better understand a specific experience, test new ideas and workflows, or better validate/invalidate overall functionality and purpose.

Low Fidelity Prototype Techniques
1. Pen & Paper
As one of the most adaptable and widely used techniques, the good ‘ole pen & paper process allows individuals to collaborate using what they have on hand (pen and paper) to source ideas and concepts from as many people as possible.
Pen and paper can be an incredibly effective way to communicate ideas to your team and stakeholders, without conducting a larger session.
Here are a few example circumstances where a pen & paper technique might be applied:
- A customer has requested a new feature for the product that your team has built. This feature has various ways of being implemented, and it seems like each team member has a different suggestion or idea for how it can be completed.
- A client has a new idea for an application. This app is meant to serve and solve a specific problem or task for the end-user, or, there’s at least one focused user flow that needs to be clearly defined in order for the product to succeed.
How might you conduct this?
The good news is that Pen & Paper exercises are incredibly flexible, so consider what needs and constraints you may have, and feel free to adapt them to what best works for you. Below are a few steps you can take to get your groundwork in place:
- Gather necessary individuals into a room — stakeholders, application developers, end-users, designers, etc. This exercise is inclusive to all people, and requires only that you’re willing to participate!
- Provide each person with paper and a pen, and describe the problem that is to be solved.
- Place a timer (~10 minutes) and advise each person to visualize & demonstrate how that problem might be solved.
- Once the timer has expired, allow each individual to walk through their proposed solution.
- Review the differences/similarities between each approach, and collect any feedback/suggestions during this time.
- You can also allow the team to utilize a “note & vote” session to determine notable and actionable feedback.
2. Feedback Forms and Surveys
Feedback forms and surveys are a great low impact way to reach large audiences. In order to be effective, feedback forms and surveys have to be precise and unbiased, so it is important to pose and word your questions appropriately.
Here are a few example circumstances where feedback forms and surveys might be applied:
- You’re looking to rebrand your company, and a new company logo is next up on the to-do list. It’s important to your team that the logo is widely accepted by your customers, so you’d like their input during this creation process.
- There’s a decision to be made for your product, and that decision would greatly benefit from a bit of data to back it up. You don’t have access to an analytics tool, but you do have access to many individuals who might be willing to answer a few short questions.
How might you conduct this?
- Consider your tool options, and determine what works best for your needs.
- Google Forms and SurveyMonkey are widely-known free tools that most people are comfortable with. However, these tools may not provide visuals or graphs of responses.
- Typeform is a paid tool that provides data visualizations and customizations, but it can take a little bit of time to learn how to use it.
- When you’re crafting your questions, make sure that you aren’t posing questions in any sort of leading way. Additionally, keep surveys relatively short (~ 5 minutes to complete) to ensure end users feel comfortable completing the survey, so word your questions in a way that will provide the most value while being easy to answer.
- Surveys are only effective when they provide unbiased feedback. The individuals who receive your survey should be — if possible — users who do not have a direct relationship or investment in the product.
- Each response (especially any free-text response) should be reviewed and considered as your team determines what to iterate upon next.
Related Read: 10 Best User Feedback Software To Improve Customer Satisfaction
3. Initial Concept Validation
Initial concept validations are one of my favorite approaches to utilize when you’re trying to validate a product during the early stages, as well as when you’re looking to validate additional features for a long-standing product.
This technique involves ensuring (or validating) that the product concept is going to be useful, relevant, or necessary for customers. I have to say, it can take a little bit of guts or courage to try these out, but if you’re willing to ask the right questions, you’ll be sure to find answers.
Here are a few example circumstances where initial concept validation might be applied:
- You’ve got a new product concept that you’re looking to launch, and you’d like to gauge the audience’s interest in this new product.
- Another way to implement this approach is for ideas that have already been validated, but you’re looking for additional engagement for a new feature or tool within the product.
How might you conduct this?
By spinning up a landing page or website, using, for example, a one-page website builder, you can create a great opportunity to present some of the more basic information around the product, while requesting email addresses from users to keep them in the loop.
This requires users to consider if they’re truly interested — based on whether they’re willing to receive emails and updates as the product progresses. This also provides you with a set of beta-testers and users who may be more likely to engage in longer term testing and validation down the road.
Another opportunity to utilize this technique is when a product moves from being a free tool to one that is paid. How might companies determine if users are actually interested and invested enough to start paying for tools? They start out by asking a simple question: “Would you swipe your card today?”
- There are lots of aspects and considerations to be made in the world of pricing, but before any of those decisions can be made or numbers can be hashed out, the concept of paying for the product has to be validated.
- By asking this question, users must pause and evaluate the return that this product provides to them. Is it worth it? Could I live — unchanged — without it? If users are eager and willing to swipe their cards, you’ve got yourself a validation.
High Fidelity Prototype Techniques
1. Digital Prototypes & User Interviews
If you’re considering utilizing digital prototypes and user interviews, you’re looking at one of the quintessential high-fidelity prototyping techniques (or at least, one of my favorite go-tos!).
This method does utilize a decent amount of resources across different domains, so it’s fairly standard practice to ensure you’ve got some validated interest in the overarching idea, prior to investing time and people into creating and interviewing end users.
This is not to say that brand new concepts shouldn’t be tested using this method (I recommend it if you can swing it!) but it is important to note that by creating and refining the prototypes, as well as interviewing end users, you’ll be utilizing a baseline amount of time in this process. How deep in the design/refinement and interview processes you go, though, is entirely up to you!
Here are a few example circumstances where digital prototypes and user interviews might be applied:
- You consider your product or feature to be a good candidate for a design sprint. You’ve found that there’s validation and design needed, and you’d like to timebox the amount of resources focused for the short-term.
- You’re an entrepreneur with a product idea that you’ve been circulating or validating with low-fidelity prototypes for some time. You’ve reached the point where you’re looking to find a way to design and validate your approach for an initial minimum viable product (MVP).
- The next feature that has been requested is a pretty heavy lift from a technology perspective, so you’d like to create a prototype to validate that the feature truly solves a problem for end users, while searching for ways to minimize scope through user feedback.
How might you conduct this?
If you have a design sprint facilitator handy, consider yourself incredibly lucky and tap into their expertise! If you find yourself without that resource at your disposal, you can tap into some of the exercises that GV utilizes for their design sprints, and implement them across your projects — focusing on targeting a segmented area and problem, designing out potential solutions, and interviewing end-users for feedback and iterations.
You don’t have to invest a full week at the start, especially if that’s not feasible for your team. These can be timeboxed to fit your needs. Crema has had success in practicing a 2.5-hour feature sprint before diving into further sessions for incremental prototype design and feedback.
2. Breadboarding
The team at Basecamp has helped to spread the word and value of breadboarding in their tried and true technique, which they use within their own organization. This technique can also be considered low fidelity, as you’re not creating assets or designing digital prototypes during this process.
However, in order to really align on the best approach using this breadboarding process, you’ve got to have the right set of people in the room — and many times that means resources from development, design, product, stakeholders, and end users.
Because we are utilizing individuals ranging from various teams, there’s a strong argument that you’re actually creating a prototype with high fidelity — one that is refined and ready to be implemented from a design standpoint.
Here are a few example circumstances where breadboarding might be applied:
- You work for an organization that produces Software as a Service (SaaS)
You have internal stakeholders (leadership), external stakeholders (clients who use the product), sales teams who sell the product, and product teams who build the products. Time and time again, you’ve found yourself in a situation where at least one or more of those groups has felt or voiced that X or Y solution didn’t fit the need from their perspective.
- You work on a product team, creating software or tooling for a specific client:
You’re looking to collaborate with each prospective member of the team and your client to ensure that the workflow is considerate of all needs, requirements, and product specifications, prior to designing and developing.
How might you conduct this?
Determine who needs to be in the room. Depending on the problem that you’re trying to solve, you may need to narrow down the focus group or expand the room to ensure that all parties are represented and part of the decision making process.
Just like Basecamp recommends, utilize a whiteboard (or virtual whiteboard, like Miro!) and focus on defining a user flow with three basic elements, only using words (no pictures!):
- Places: These are things you can navigate to, like screens, dialogs, or menus that pop up.
- Affordances: These are things the user can act on, like buttons and fields. We consider interface copy to be an affordance, too. Reading it is an act that gives the users information for subsequent actions.
- Connection lines: These show how the affordances take the user from place to place.
Discuss each element with your team, iterate the connections, affordances, and even places with the feedback that is received. You’ll do this step as many times as it’s needed — to ensure that different perspectives and viewpoints are reviewed so that each flow can be considered and if applicable, incorporated, prior to design implementation
3. Patchwork Prototyping
Patchwork prototyping is a type of rapid prototyping that involves the use of open-source software and was a part of an incredible study at the University of Illinois.
This approach in prototyping takes into account so many of the things that we instinctively do to create uniformity and save time (such as choosing to use material designs rather than custom designing a UI) as we build product prototypes, while bringing open source software into the equation as well.
According to the study, patchwork prototyping involves “patching together open-source applications as a means of creating high-fidelity prototypes,” and “combines the speed and low cost of paper prototypes, the breadth of horizontal prototypes, and the depth and high-functionality of vertical, high-fidelity prototypes.”
Here are a few example circumstances where Patchwork Prototyping might be applied:
- You’ve received requests for new functionality within your product, functionality that might be a bit out of scope for what your tool was originally intended for, so you’d like to validate this request with other users or stakeholders before taking on the full challenge of building it out.
- Time and/or resources are limited, but you need a rapid way to validate a concept or use case, or to gain momentum with users or stakeholders.
How might you conduct this?
Let's say that you’ve received a request to build out a custom CRM. In that CRM, they’d like to have not only records of customers/management of clients, but visibility into different projects for each of those customers, as well. In other words, it should act as a “one stop shop” for managing clients, while also doing the work for the clients as well.
Before building out each tool individually, validate whether this tool is sustainable and solves the problem that the requester is facing. So, you’ll utilize patchwork prototyping to implement a quick solution, prior to developing any custom software.
- You’ll begin by researching open source software that might be a good fit for the short term prototype. For example:
- VLC Media Player (Media Player)
- GIMP (Photo Editor)
- Once you’ve selected the different tools that you need to fit the various requests within the product, you’ll begin to stitch them together.
- The desired outcome isn’t to create a perfect product. In reality it might feel a bit weird to use so many different open source tools within one another. However, this will allow you to quickly generate a functioning, high fidelity prototype to validate your approach.
- Once tested and validated, you may find that a few simple iterations within the open software will work for your use cases, or, you’ll have the feedback that you need to refine the concept and create your custom solution.
Rapid Prototyping & Iterative Design Process
We’ve reviewed many different prototyping techniques that can be applied across various states of products and ideas, but now is where the hard part begins: how do I make this a part of my regular product lifecycle? It can be difficult to dive right into prototyping, gaining buy-in across various teams (and especially if you need resources to do it!).
However, the best way to get momentum and create a habit of prototyping is by starting small. Finding a small problem that users are experiencing — even if the solution seems obvious — can be a great way to test some of these techniques out with your team.
You’ll be able to find new ways to improve not only your tool, but your team’s ability to proactively collaborate and solve problems together.
Related reads: